New Term procedure for SIMS.net Integration
Andy Larking
Last Update 2 years ago
This article is to help SIMS.net sites using Xporter MIS integration prepare for the new term (typically September onwards). If you are using a different MIS (Arbor, iSAMS, Bromcom, Cloud School etc) please use this guide
Xporter will automatically create your rooms, lessons, classes based on your timetable start and end date. If your timetable is not due to start until September BUT you need to allow bookings before the timetable is start date is effective, please follow the steps below
When your new timetable is fully 'applied' in SIMS (typically this is automated on the first day of new timetable), the Xporter MIS sync will restart and manage the lessons and academic year.
Step 1 - Preparing your new term Academic Year
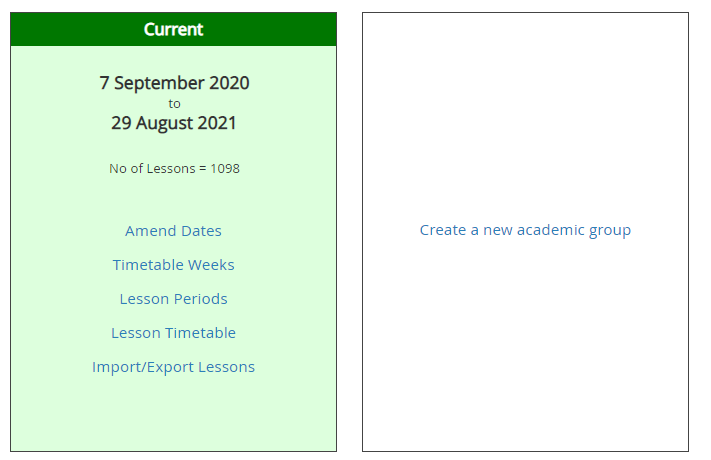
In SchoolBooking go to Administration - Academic - Academic Manager (you will need to skip the Assembly MIS re-direct message to access Academic Manager). Select 'Create a new Academic group'. You can choose to Amend the start and end dates if required (note: Academic Year dates must start on a Monday and end on a Sunday. You can mark dates as closures in Step 2 so it matches your School calendar)
Step 2 - Set Holiday & Closure Dates
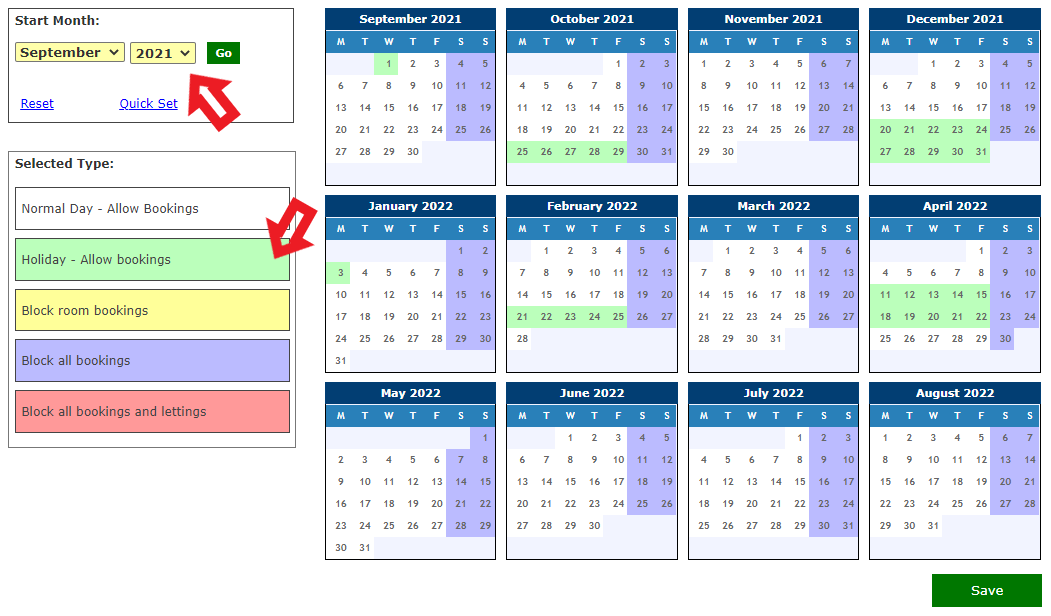
Go to Administration – Academic, and select ‘Holidays and Closures’. You will see a calendar starting with the current month.
Change the Start Month to the begining of your academic year (ie. September).
Now select the Day type and click on the dates that apply. Typically weekends should be set to Block All Bookings and Holiday weekdays are set to Holiday - Allow Bookings. Depending on how far in advance you allow your staff to book, you should only need to add these dates upto December. When the Assembly MIS sync restarts it will add all your other holiday and closure dates. When you have made your changes click ‘Save’
Step 3 - Run the SIMS report with a September Effective date
Download the attached zip file contains a SIMS RPTDEF file.
Now Open SIMS
● In the Reports menu select ‘Import’.
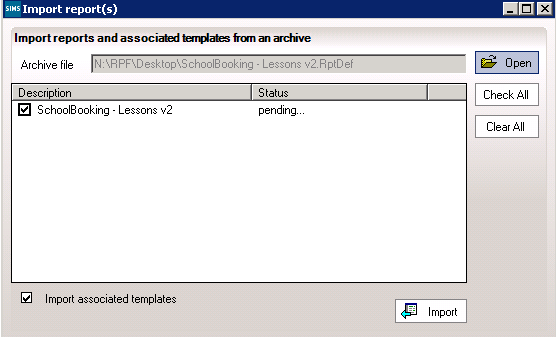
● A new window will appear. Click on the Open button and browse to the folder containing this document. The folder will also include a file named ‘SchoolBooking-Lessons v2.RptDef’. Double-click on it
● The main area of the screen will now populate. Click on the Import button
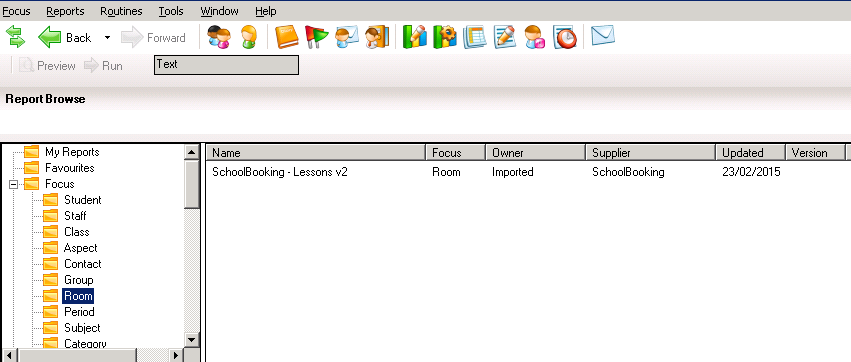
After the import has completed, Select 'Run Report' from within the Reports menu. A new page will appear. Double-click on the entry in the main area named ‘SchoolBooking – Lessons v2 (if it does not automatically appear in the main area…. on the left side, expand the ‘Focus’ entry and then click on the ‘Room’ folder).
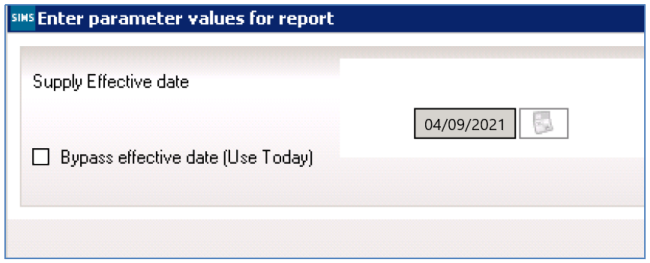
A new window will appear asking for the effective date of your report. By default, this will be for today’s date. *Important* You must now change this to the date of your new term (ie. September 4th 2021). Amend the date by removing the tick for 'bypass' option
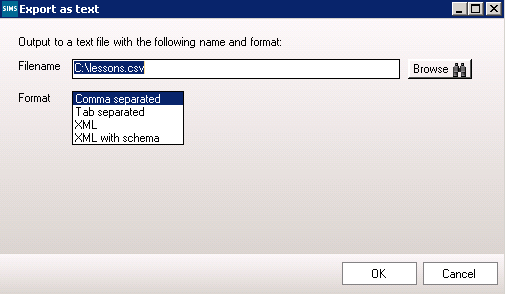
Another window will appear asking where to save the import file. Save somewhere locally and Save in format 'Comma Separated'. Click OK and the report will be created on your pc
Step 4 - Import the SIMS lesson data and set timetable weeks
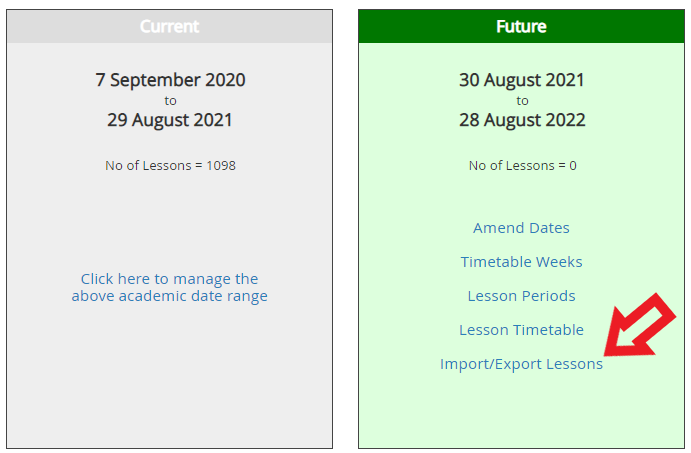
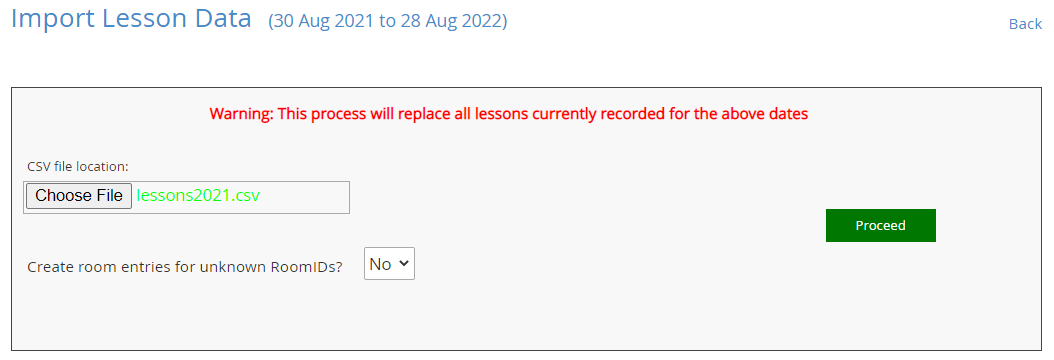
In SchoolBooking go to Administration - Academic - Academic Manager. Now select Import/Export Lessons from your new Academic Year. On the next page choose the option Import Lessons - SIMS and click 'Go'
At the Import Lesson Data page, choose the csv file you created earlier in SIMS and select Proceed. Create room entries for unknown RoomIDs leave set to 'No'. You should then see a preview of the data you are going to import for the new academic year. Read and follow the on-screen instructions. If you are not seeing the preview as expected, please contact our customer services team and they will be able to help (email your csv file to [email protected] asking for assistance with new term lesson import)
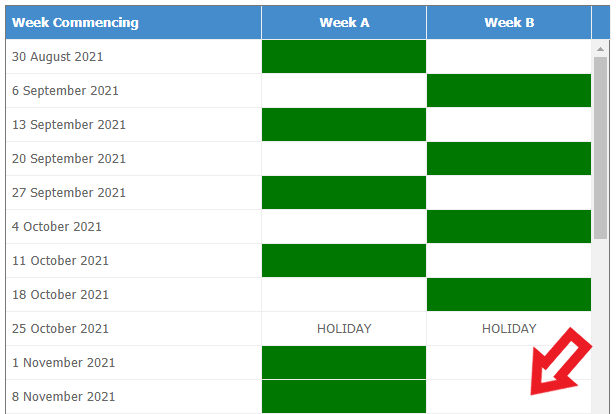
After a successful import, your can now set your timetable weeks (only applies if you have a 2 week timetable). Go to Administration - Academic - Academic Manager, and select 'Timetable Weeks' from new academic year. Then simply select the week 2 (or B) weeks as required.
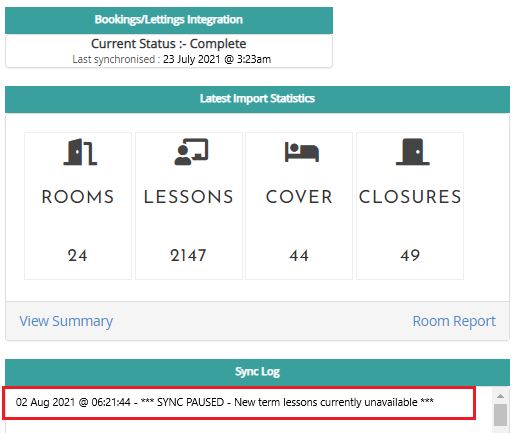
Now your site will be ready for staff bookings in the new term. To review the status of the Xporter MIS integration, go to Administration - Academic - MIS integration. The sync logs will indicate 'Sync Paused – New term lessons currently unavailable' until the beginning of the new term when your data will be refreshed with the sync automatically.
