How to create the Parent Meeting data report in SIMS.net

Andy Larking
Last Update 2 years ago
This article is for sites looking to manually import Parent Meeting data from SIMS.net. The alternative option is to use the MIS Integration from Xporter.
PART 1 – CREATE THE PARENT MEETING DATA REPORT in SIMS.net
If you have already done this, skip to PART 2
Open SIMS
● In the Reports menu select ‘Import’.
● A new window will appear. Download this report file. Double-click on it.
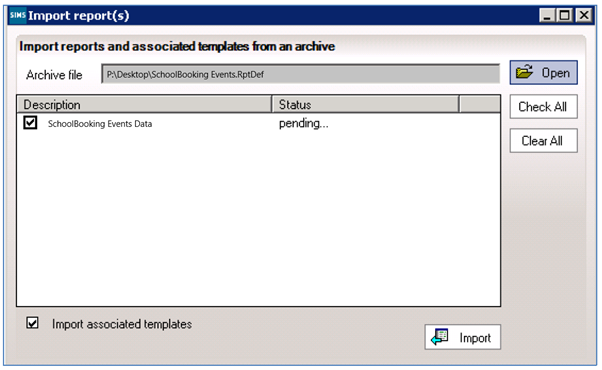
● The main area of the screen will now populate. Click on the Import button
● After a second or two, the status entry will change from ‘pending’ to ‘imported’. Click on the Close button.
The above is a one-off process. In the future, whenever you need to generate a new Parent Meeting data report, only the instructions for PART 2 need to be followed.
PART 2 CREATING THE PARENT MEETING DATA REPORT
● Open SIMS
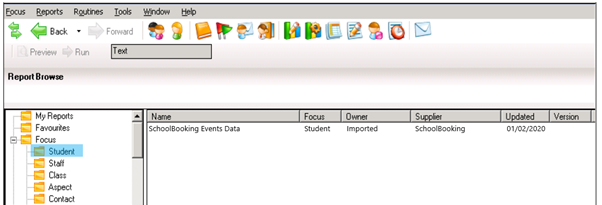
● Select ‘Run Report’ from within the Reports menu. A new page will appear.
● Double-click on the entry in the main area named ‘SchoolBooking Events Data (if it does not automatically appear in the main area…. on the left side, expand the ‘Focus’ entry and then click on the ‘Student’ folder).
● A new window will appear asking for the effective date of your report. By default, this will be for today’s date.
GENERATING THE EVENTS IMPORT FILE
● Another window will appear asking where to save the import file.
Tip: if you do change the default location or the name of the file, please ensure that the final filename ends in .csv
● Click OK and the report will be created on your pc.
● Locate the file and open it in a spreadsheet application (Excel, OpenOffice etc), You should see 22 populated columns and several hundred rows.

● The file is now ready to be imported into SchoolBooking via the Import Data module