Resource tracking setup

Andy Larking
Last Update 3 years ago
Introduction
The purpose of this module is to keep an extra eye on your bookable resources so that their current location is known at all times. In particular, this will reduce the amount of investigating required should an item go missing as you will have an accurate record of i) who had the item last ii) when it
was passed to them.
Note: This feature is only relevant to resources that, when not in use, are stored in a specific location. Additionally, somebody within that location will need to be available to log when an item is collected for a booking, and also when it has been returned.
Typical example of use:
You have 5 digital cameras stored by the IT Department.
When a camera is booked, the booker needs to collect it from the IT Department. A member of the IT Department then logs it out.
Once the booking is complete, the booker needs to return it to the IT Department. A member of the IT Department then logs it back in.
The day to day usage of this feature is very quick and simple and involves little more than somebody clicking a button whenever a resource has been collected or returned. However, please be aware that it relies on all collections/returns being logged as soon as possible (ideally, at the same time it
occurs). If the logging for even a single booking is ignored or delayed for too long, it not only defeats the purpose of the feature, but may require the tracking of that resource to be reset.
When visiting the Tracking module in the Administration area for the first time, a general introduction page is displayed…
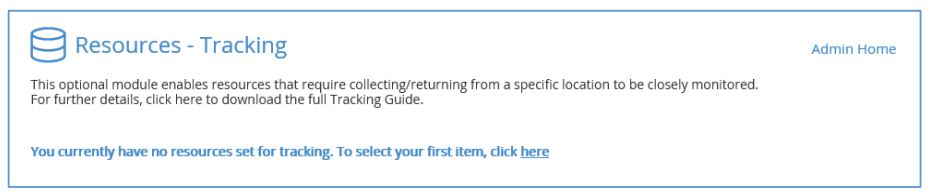
The ‘To select your first item, click here’ link takes you to the Resource Selector page…

The display will be mostly empty - other than a single drop-down menu near the top of the page.
In the drop-down menu, select a resource that you wish to activate for Tracking and then click on the grey Yes button. A new area will appear onscreen with the heading ‘Tracking Settings’.
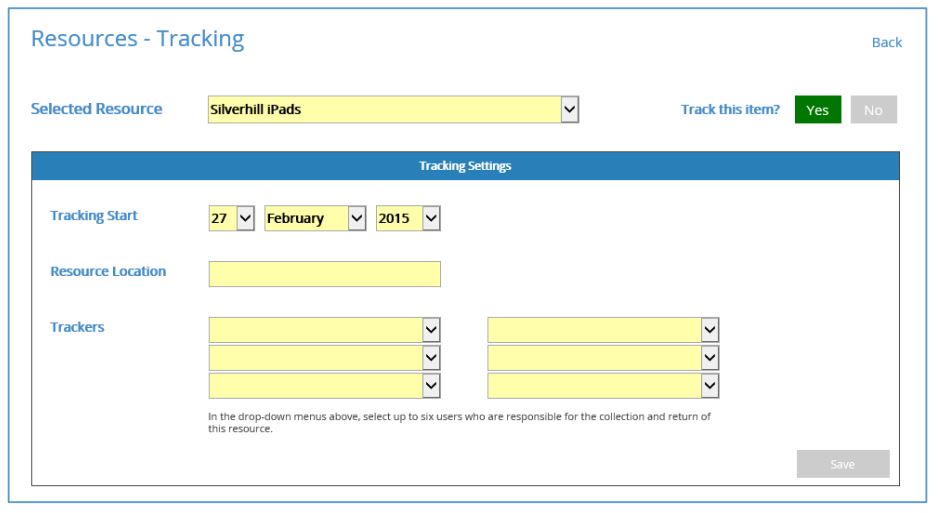
There are three settings to populate…
Tracking Start
This is the date that bookings for this resource should begin to include a tracking record.
Tip: In most cases, you should select a start date of tomorrow or later. However, if you are just
evaluating this feature and want to see it in action straight away, you can select today’s date (and
change this setting later if required).
Resource Location
In this field, type in the place where the item should be collected/returned (e.g. IT Department,
Reception Desk, Main Office etc).
Trackers (non-admins)
These drop-down menus refer to which members of staff are able to log the collection/return of the resource.
Note: SchoolBooking administrators are able to view and log the collection/return of all trackable
resources. Therefore, at present, only non-admins have to be listed here.
When ready, click on the Save button
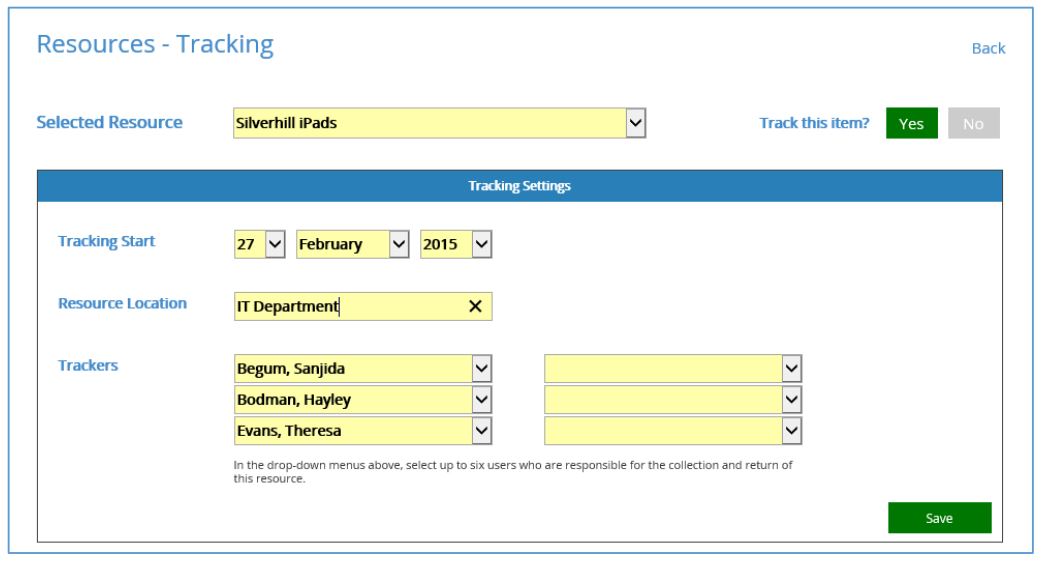
If you have other resources that you wish to include for tracking, select the next item in the list and repeat as before.
When all applicable resources have been activated, click on the ‘Back’ link in the top-right corner of the page to return to the main tracking index.

The page will now include a table showing all resources activated and the relevant dates/trackers. Should you need to change any settings later, click on the resource’s row to revisit the setup page. This concludes the administration setup.