Storefront Setup
Andy Larking
Last Update 3 years ago
The Storefront is a separate website you can customise and use to promote your sites facilities. It provides a calendar for each facility that your hirers can use to check availability. This dynamically updates to match your Letting plans and current availability.
Step 1 - Add photos and facility description
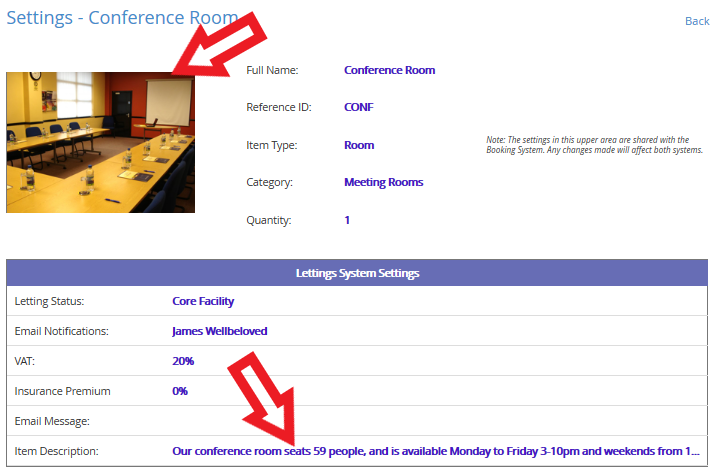
Go to Administration - Lettings - Facility Manager, and select a Core Facility that you have already setup. Now add you Facility photo and description.
Photos must be exactly 800 x 600 in size, either a jpeg, jpg, gif or png file. You can do this with the Windows photo app or Photoshop (not sure how to do this, just email your images to use and we will resize them for you [email protected] )

Step 2 - Customise your Storefront
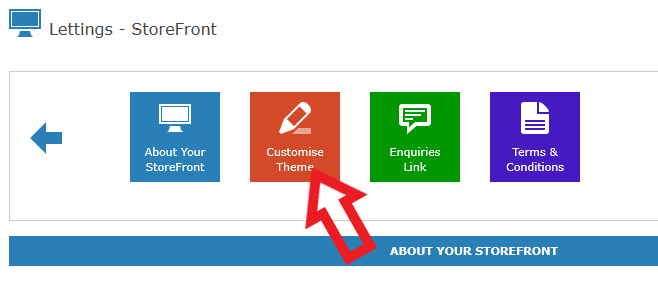
Go to Administration - Lettings - Storefront, and select 'Customise Theme'

From here you can customise your theme, adding a top and footer images, change the properties of the 'Our facilities' button bar, and background colours. The top and footer image must be exactly 1000 pixels wide, and be no more than 600 pixels high.
Depending on your experience working with images, school logos etc, you can ask us to help (or find someone from you media/design team that might be able to help).
Now select 'Enquires Link' and 'Terms & Conditions'. These are plain textboxes where you can add extra details about how to make an reservation enquiry, and perhaps links to your terms & conditions.
Step 3 - Locate your Storefront URL and Review
Select 'About Your Storefront', and find the URL. It will follow this format https://{your site ID}.schoolbooking.com/hire (this is the URL you need to use if adding a link to your school website). Clicking the URL or your Storefront preview will open a new browser tab. This is will be how your storefront will look to your hirers. Make changes as needed and refresh the page.
