Logging a Booking

Andy Larking
Last Update 3 years ago
From the Home Dashboard, click on the Booking Planner button.

At the top of the Planner plan are the three settings that determine which dates/items are currently on display.

Usually, at least one of these settings will need changing before you can proceed.
To do so, click on either of the green buttons.
A small popup window will appear…
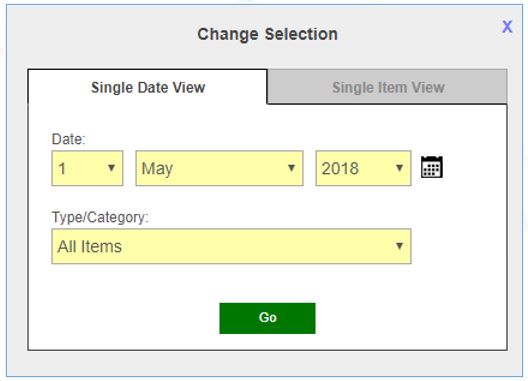
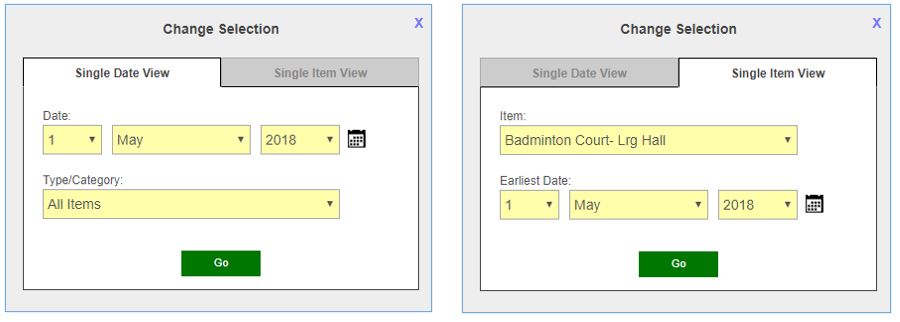
The first thing to consider is whether Single Date View or Single Item View will be more useful…
▪ If your booking must be on a fixed date and for a specific room/resource, then either version can be used.
▪ If your booking must be on a fixed date but you are flexible on the room/resource, select Date View.
▪ If your booking must be for a specific room/resource but you are flexible on the date, select Item View.
If the view required is not the one currently on display then – before using the drop-down menus – click on the applicable tab to switch over.
After making your selections and clicking ‘Go’, the page will refresh.
Tips
Single Date View includes a filter so that only the items for a particular type/category will be listed – e.g. “show just rooms”, “show just resources”, “show just the meeting rooms”.
If changed, the selection here will still apply on your next visit to the Planner - so if the item you require at the time is not included in the main display, it may be because of this setting.
If you plan on repeating the booking over two or more dates (i.e. same item/times but on different dates), your selection at this stage should be for the earliest of those dates.
For the purposes of this guide, we will be booking…
Room E13.
During Period 1 (09:15 to 10:15)
On 15th May.
After making our selections at the top of the page, we can now see the availability of Room E13 and also that it is currently free for booking during the required times.
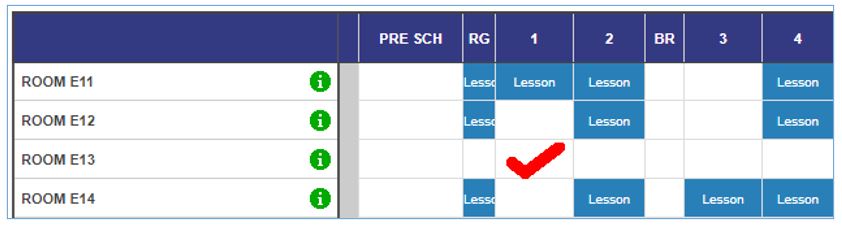
Clicking on the empty slot will turn it green.
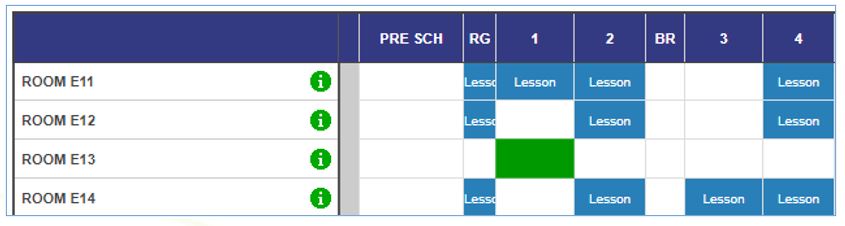
The area at the very bottom of the page will now show…
Confirmation of the item and times selected.
A Proceed button.

On proceeding from the Planner page you will then be presented with some additional options…
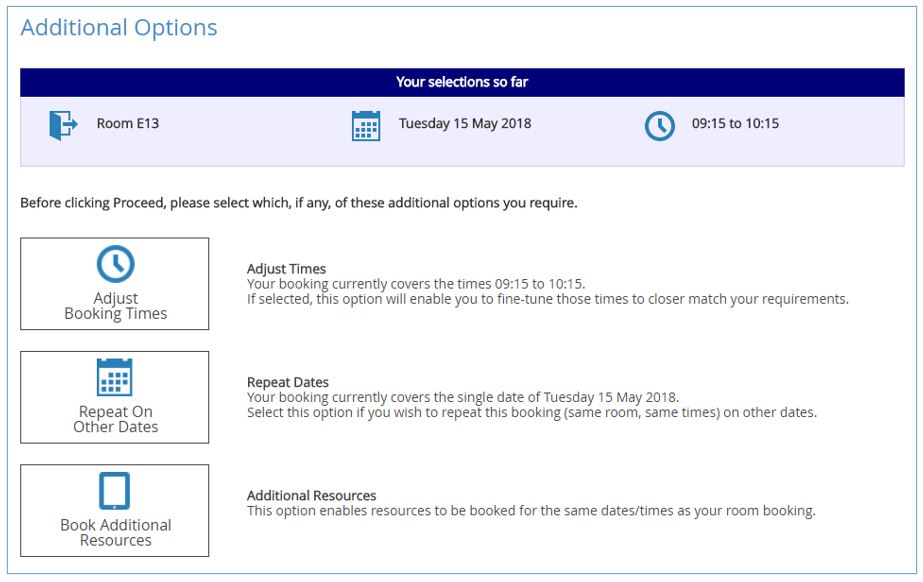
None of these options are required for our example booking, however, there will be occasions when they do apply for you.
Adjust Booking Times
On the Planner page it was only possible to select whole booking slots with fixed start/end times.
This option enables the applicable times to be ‘fine-tuned’ should the full range not be required.
Example
At this point we have selected 09:15 to 10:15 for our booking times.
Should we only require 09:15 to 09:45, this is where we would go to make the adjustment.
Repeat On Other Dates
Sometimes you may need to log the same booking over several dates - e.g. book the Main Hall every Monday between 9am and 11am for five consecutive weeks.
This option avoids the need to go through the whole booking process for every one of those dates.
Book Additional Resources
If your room booking also requires the use of a resource (e.g. when booking a Meeting Room, you may also require a portable projector) or if you require two or more resources at the same time, this option also avoids the need to log each reservation separately.
The final stage involves…
▪ Checking that your selections are correct.
▪ Adding a brief comment/explanation of what the reservation is for.
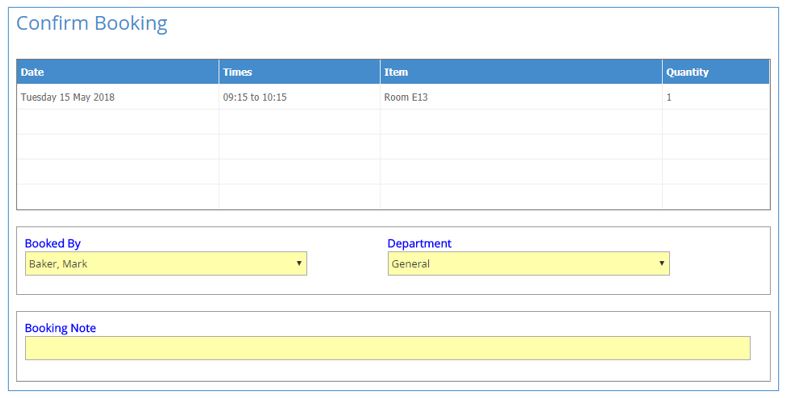
Note: In most cases, the ‘Booked By’ and ‘Department’ fields will only include one option. Changes to these selections are generally only relevant to users who are able to log a booking on another user’s behalf.
However, if there is an obvious error here (e.g. your name is not showing under Booked By), please check with your SchoolBooking administration before confirming the booking.
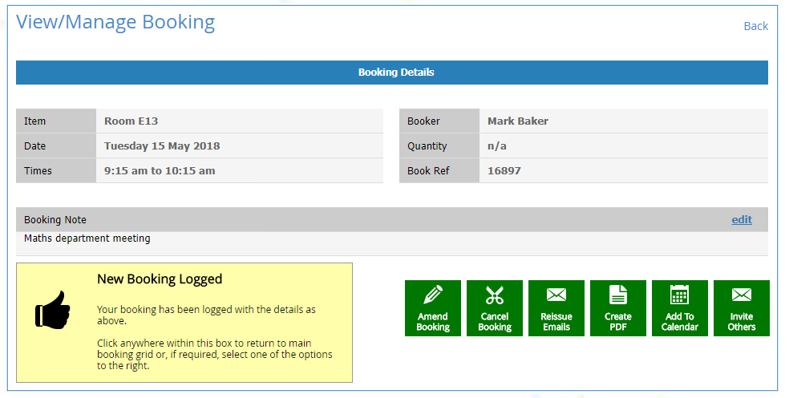
On Confirming the booking…
Email notification will be issued to the relevant persons.
You are then taken to the booking’s View/Manage page. Assuming that no further action is required, click on the yellow ‘New Booking Logged’ box.
Back on the Planner page, the new booking now occupies the applicable slot(s).
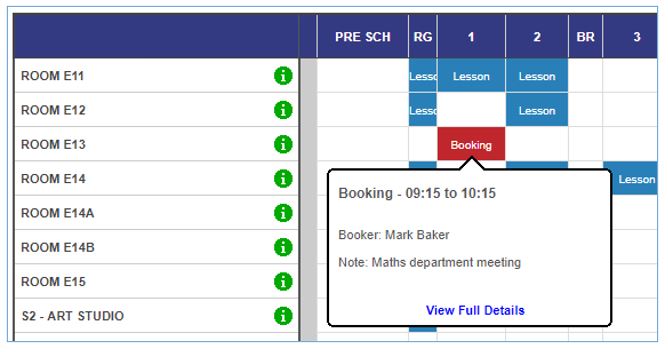
And in the Booking Records area, the new booking is now listed.
