The Facility Planner

Andy Larking
Last Update 3 years ago
Introduction
The Facility Planner / grid page has two purposes...
● It gives a general overview of your site’s letting activity.
● It is the starting point of logging a new reservation
This guide concentrates on the various options that are available on this page as well as how to make use of it for
overview purposes. If you are new to SchoolBooking, it is recommended that you follow this guide first to gain an
understanding of how the grid page works, and then move on to the separate guide ‘Logging a new Reservation’.
At the top of the page are various options such as changing the date currently on display, or adjusting the size of
the grid to better suit your monitor resolution. These are covered in more detail later in this guide, however, one
key point to note....
There are two display types available.....
● View multiple facilities on a single date.
● View a single facility over multiple dates.
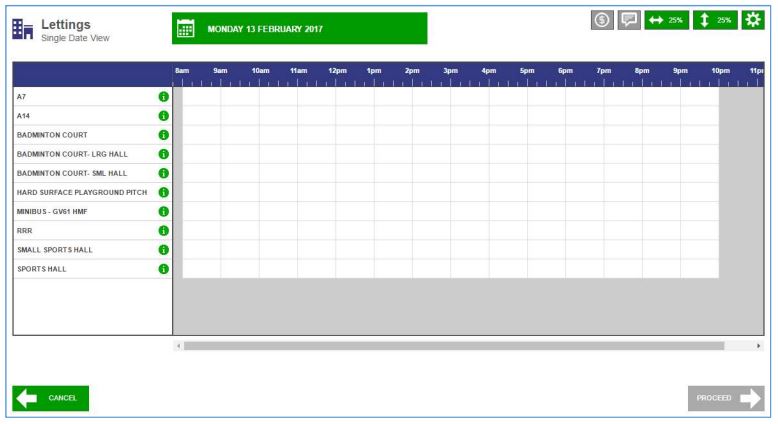
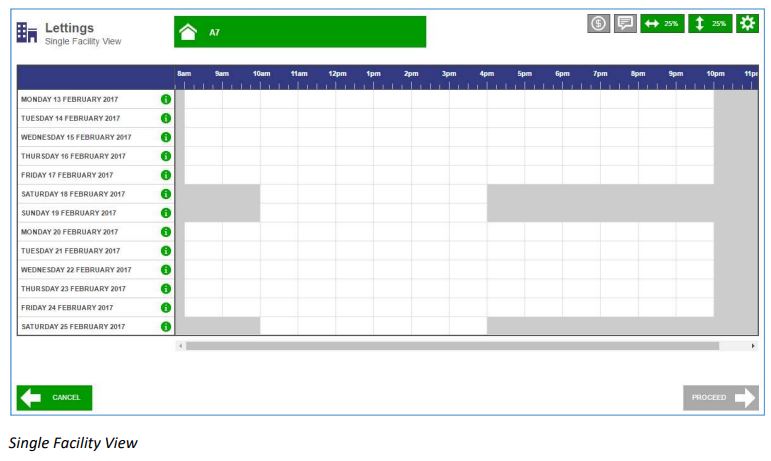
The examples in this guide are based on the first type – however, both versions work in a very similar way. The
key difference being what each row in the main display represents... In Single Date View you’ll see a list of
available facilities, in Single Facility View you’ll see a list of available dates.
Changing the Date or Facility
By default, the display is set to show today’s activity for all facilities. If required, you can change this to...
● A different date.
● Just a certain type of facility (based on the category name).
● The details for a single facility over several dates.
At the top of the page is the date currently set for display. Click on it to reveal the Change Selection box.
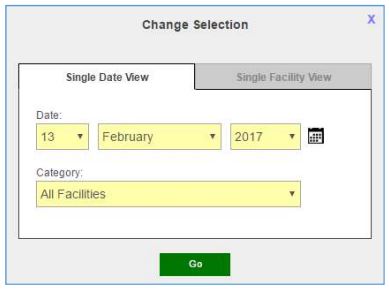
When in Date View you will also see an option to include just the facilities that fall under a specific
category name. Unless you have a very large number of facilities, this second option can normally be
ignored.
When switching over to Facility View, you will see slightly different options where the Facility is the main choice followed by an Earliest Date. Once changed, these new settings will be remembered for the duration of your current login session (they will
reset to the defaults on a new login).
Personalising the display
In the top-right corner of the display are various buttons.

From left to right they are...
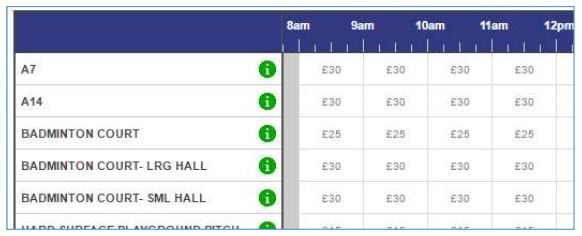
● Show or Hide the letting fees.
This determines if the fees for each individual letting slot should be displayed or not.
Although sometimes useful to know (such as if a hirer is on the phone asking for a quote), these fees are not
technically needed at this stage and so can be hidden until/unless they are required.
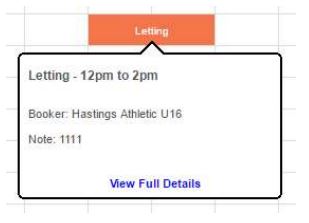
● Show the ‘Information Bubble’ via either a mouse-click or a mouse-hover.
Once existing lettings (and bookings/lessons) become a factor, they will occupy the applicable slots inside the
grid.
Basic information about each reservation is then available via a small popup bubble that appears if a slot already
in use is selected.
In certain scenarios, you may want to check these details for multiple reservations. If so, enabling the Hover
option avoids the need to click on each icon one after the other. Instead, just moving your mouse cursor around
the page will display the applicable bubble.
Important: The hover option is only intended to be activated temporarily. Whilst enabled, other options on the
page may be affected – for example: the View Full Details link inside the bubble will not be available (as the bubble
would vanish before you have a chance to click on it). Also when trying to log a new reservation it could be very
distracting with the bubble constantly appearing/disappearing as you move the cursor around the page.
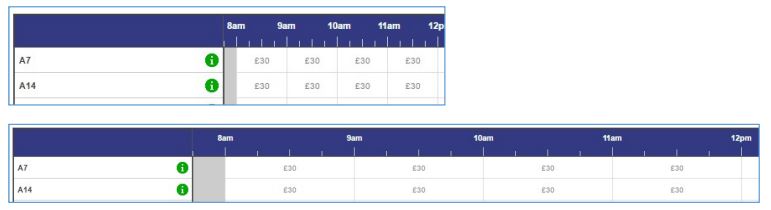
● Increase/Descrease the width of the grids.
Depending on your monitor resolution and the length of a typical letting slot, you may prefer the grid to use up
more screen space for each hour. This option rotates through four possible sizes.
● Increase the height of the grids.
Similar to the above option but this time it is the height of each row that is affected. This may be useful if you
only have a few facilities and a lot of unused space on-screen.
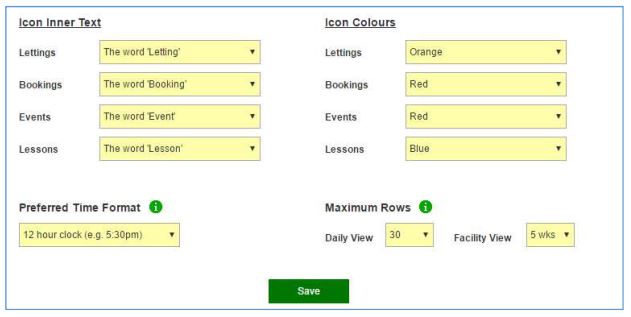
● Other options.
The final button covers options that rarely need changing more than once.
Here you can choose whether to display times in the 12 or 24 hour format, select different colours for the
booking/letting icons, or set how many facilities/dates can be displayed at any one time.
Tip: Depending on the internet browser you are using and how many individual slots are involved, the Maximum
Rows setting may require a bit of experimenting to find the perfect balance between performance and usability.
Internet Explorer in particular can struggle if too much is happening onscreen.
Facility Information
Each row includes a green info icon inside the leftmost column.
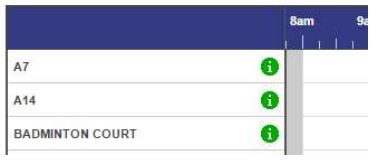
Clicking on an icon takes you to the Information Area specific to the selected facility/date.
This area consists of three tabs. Two of which are immediately available.
Tab 1 – Facility Info
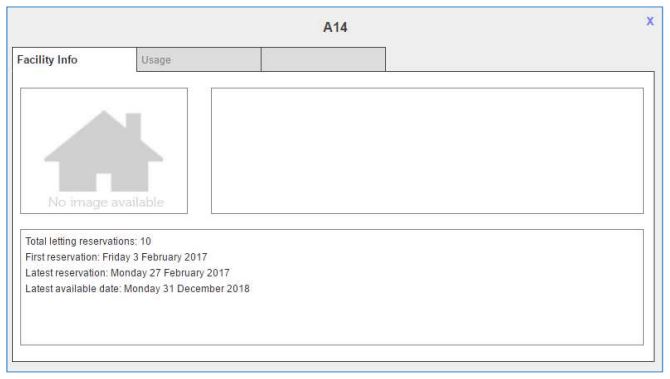
This first page is broken down into three areas....
i) An image of the facility (if one has been uploaded in Administration/Facility Manager). Clicking on
that image will show the full-scale photo.
ii) Any comments about this facility (again this is recorded in Administration/Facility Manager).
iii) Basic letting details such as how many times the facility has been reserved, and the latest available
reservation date.
Tab 2 – Usage
The second tab consists of a list of all individual lettings, bookings, and lessons that apply on the selected date.
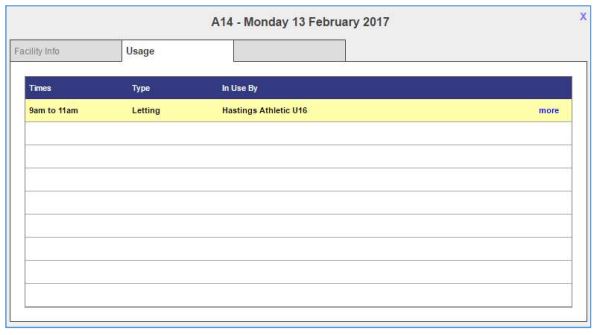
Lettings and Bookings will also include a ‘more’ option. Clicking here will take you to Tab 3.
Tab 3 – Letting Info
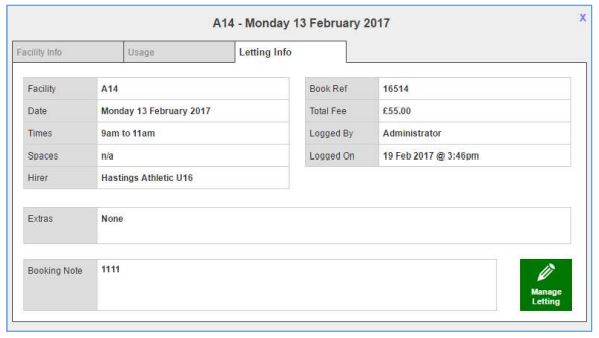
This final tab is only available after selecting a specific booking/lesson on Tab 2.
For lettings only, a Manage Letting button is available in the bottom right corner. If selected, this will take you
straight to the Manage page for this particular reservation (this is an alternative to accessing it via the Lettings
Records area of the system).