Managing your Parent Meeting Event

Andy Larking
Last Update 3 years ago
This article assumes you have already created your event. To find a different Event to manage select 'Parents' from top navigation and use the filters. Select the event you want to continue with or review and follow the link to Manage Event
This article provides the typical stages for a Parent Meeting and basic settings. Please see Event Actions and Event Tools Category for more
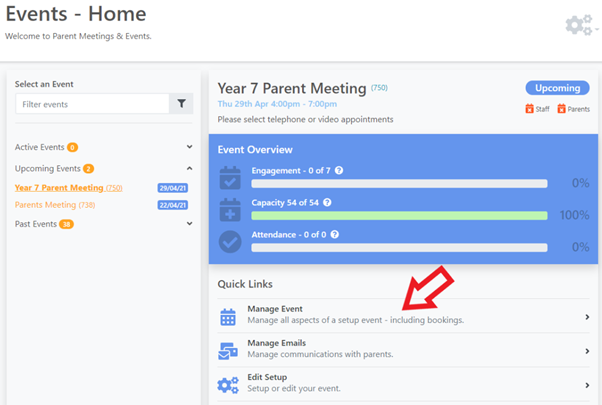
Event Overview Page
If you have just completed the setup of your event you should see the Event overview page with a some of notifications to process. As the Events Manager, you will also have access to the settings cog for fast access to event actions and reports menu.
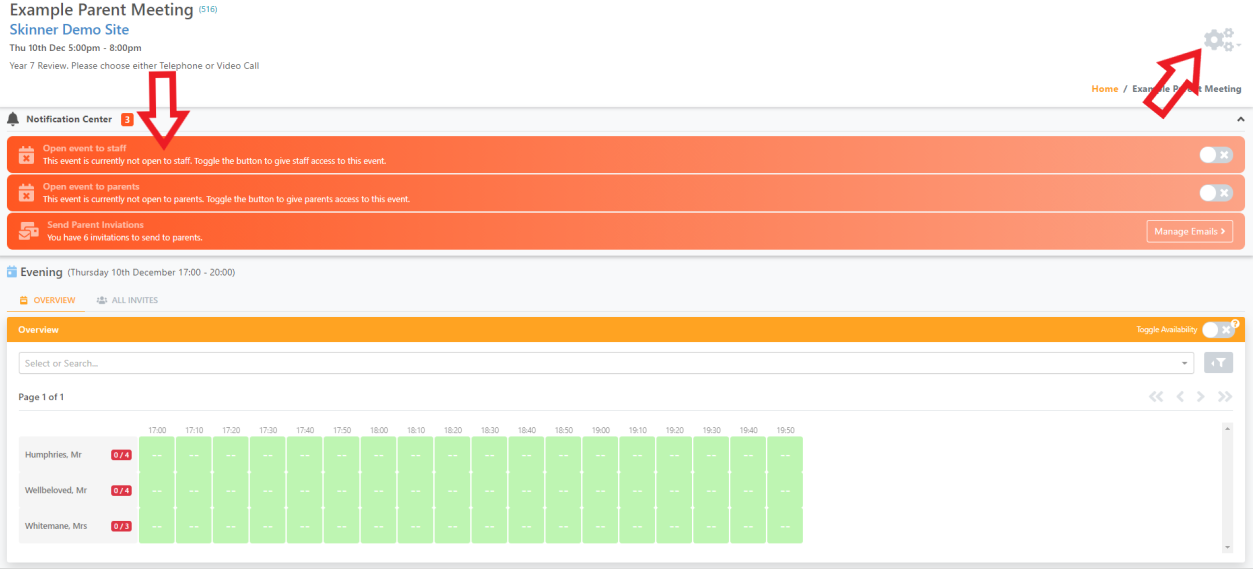
Stage 1 - Open event to Staff
When you are ready you can toggle this notification and allow your teaching staff access. They will then be able to make bookings on behalf of parents/students, set timeslots and breaks when not available and view their appointments.
Stage 2 - Edit your Event with 'Restricted' access
If you need to make changes to your event you can still do this, but depending on the event activity so far (ie. bookings) some editing functionality may be restricted. See What is restricted access ?
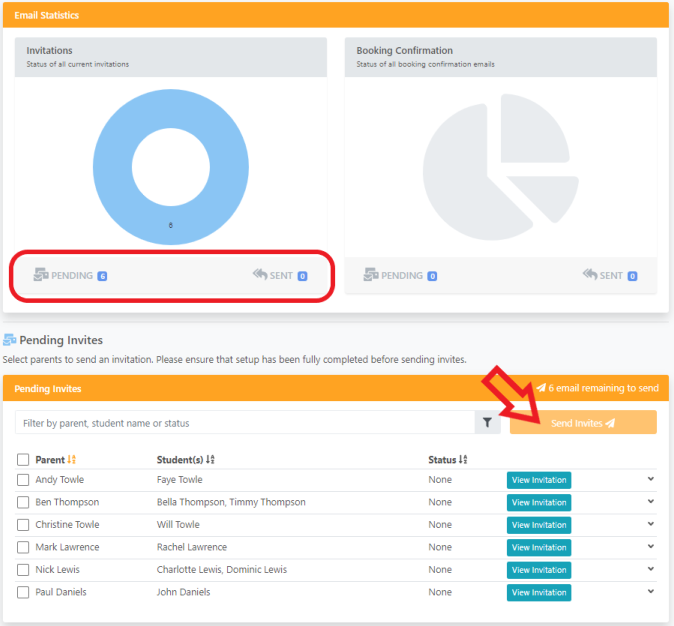
Stage 3 - Send Parent Invitations
Parents will need to be notified about the new event. You may want to send them a separate message first to advise them when the email invitations will be sent, how to activate their account and include some basic booking instructions. When ready select 'Manage Emails' - you will now see the Parent Communications page. You have 2 Parent emails to process - Send the Invitations, and then Booking Confirmations. Typically you will want to send the Invitations a week or more before the actual event date to give parents time to make bookings. Then just before the event you can send the Booking Confirmation email which will detail the booking itinerary and will help remind your parents that the event is starting soon.
To send your invitations
- Select Pending from Email Statistics summary
- Select the Parents you want to send invitations to (Tip : you can select ALL by ticking the first row header 'Parent')
- Select 'Send Invites'
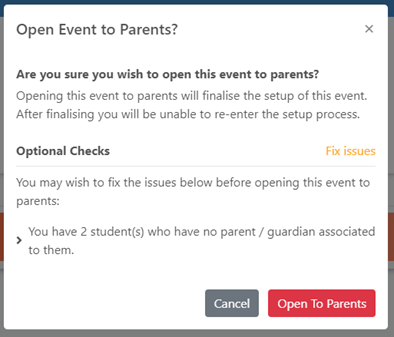
Stage 4 - Open Event to Parents
If you toggle this notification any Parent with an existing login to events.schoolbooking.com will be able to view the event and make appointments. You would normally Open to Parents around the same time you Send the Parent Invitations in previous Stage. When an event is Opened to Parents you will not be able to continue to edit and make changes to the event setup. Your setup will be checked for Parent data issues.
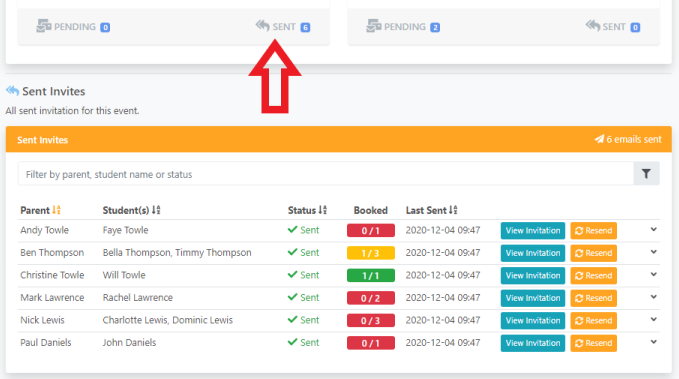
Stage 6 - Review Parent invitations and bookings
Now you can Review the Invitations by selecting 'Sent' from the Email Statistics. This will allow you to resend email invitations as required and get a summary of booking progress. Parent emails will be from the sender [email protected] . If you have an issue with a parent not receiving the invitation email (due to email filtering or unable to locate in email folders), you can choose to send from your own school/college email service. Find the Parent and select the down arrow, then click Send Custom Activation Email. This will open an new email in your email service (ie. Outlook or Google) with the invitation URL.

The process for sending Booking confirmations is the same. Booking confirmations will only list those parents who actually have bookings for the event and will include a 'Not Attending' event link for parents. To find out more see this 'Not Attending' guide.