Azure / Office 365 configuration guide
Andy Larking
Last Update 3 years ago
Configure your users to sign-in with Office 365 in 4 quick steps. You’ll need to be administrator of your Azure/Office365 tenant and SchoolBooking to do this.
Matching Existing Users
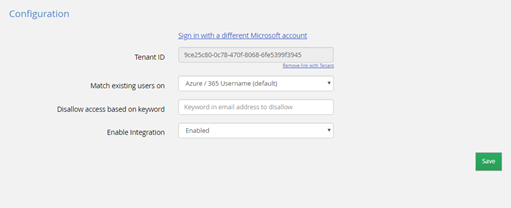
If you already have users within SchoolBooking and have completed this guide, the integrator will match users signing in with Office 365 up by using their email address. Within the configuration you can choose to either match on Azure / 365 username or Azure / 365 Primary email address. For example if you have an existing user within SchoolBooking named [email protected] and a user authenticated via Office 365 using [email protected] SchoolBooking will automatically match the users up and log the user in as [email protected] rather than creating a new user.
Step 1 – Go to Administration – Users – Azure / Office 365 Integration

Note: If you are managing more than one Microsoft tenant, please sign out of all Microsoft Azure AD / Office 365 applications from your browser before proceeding.
Step 2 – Sign in with Microsoft
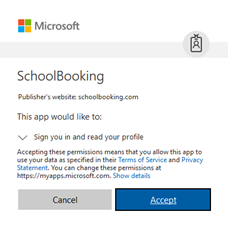
Using you Azure Administrator account Sign-in and accept the permission. Once this has completed you will be returned to configuration page in SchoolBooking

Step 3 – Save your configuration and test
When you are returned to the configuration page you should see your tenant ID has been completed and integration enabled.

Step 4 – Use Direct Login URL for Single Sign On experience
Now you have saved your Microsoft account configuration, you will notice some additional options on the administration page. Towards the end of the page a Direct Login URL will have been created https://auth.schoolbooking.com/azure/login_start.php?site={your site ID}
Copy this URL and add to staff browser favourites, desktop shortcuts or local intranet resources web links. When users select this URL link it will automatically login them into SchoolBooking without the need for usernames or passwords. If the user hasn’t yet logged into Microsoft they will be prompted to do so
Other Settings – Filter Users and Hide other forms of login
Filter Users - Basic
If your Office 365 tenant contains users that you do not want to give access of SchoolBooking to, we have two choices for security permissions - one is to use Azure ADs Enterprise App control mechanisms from within your Microsoft/Azure tenant to filter (See related article below) , or you can directly control filtering in SchoolBooking.
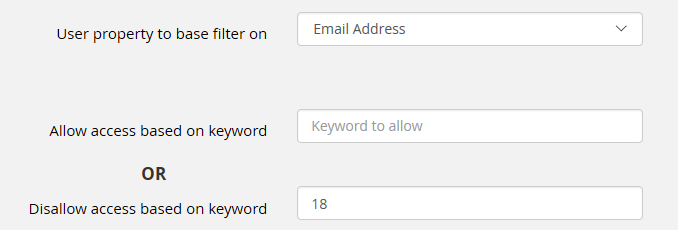
Schoolbooking can check the email address (and other Office365 user properties) of the user based on a keyword and disallow access (if any part of the email address matches the keyword).

This would be useful, if you share your domain with students who shouldn’t have access and are prefixed with a unique keyword (ie. 18******@myschool.org). If you need a specific filter that you can’t configure, please contact our customer service team or raise a Helpdesk ticket
You can leave this option blank if you want to allow all users from your tenant or you are using conditional access and are controlling access via Office 365.
Hide other forms of Login
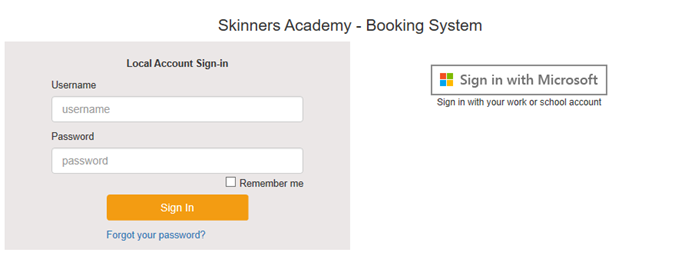
If you are not using the direct login URL, your users will still be using you sites Login URL http://{your site ID}.schoolbooking.com . Having multiple login options may confuse your users (local account and Microsoft). You can hide the local account option. Here’s a preview of the options..
Show

Hide

(Note : the Admin Login link restores the local account sign-in choice. You would need this if you had an issue with the Azure/O365 platform, and needed to manage your SchoolBooking account.
